To setup a Databricks Account, firstly we need to Sign Up using below link
https://databricks.com/try-databricksPost Sign Up, complete the registration process and login to Databricks using
https://community.cloud.databricks.com/Databricks provides us with a Unified Analytics Platform, that is available on both AWS and Azure Cloud Platforms. By default Databricks account setup is done on AWS, however it’s also available on Azure as a managed service called Azure Databricks.
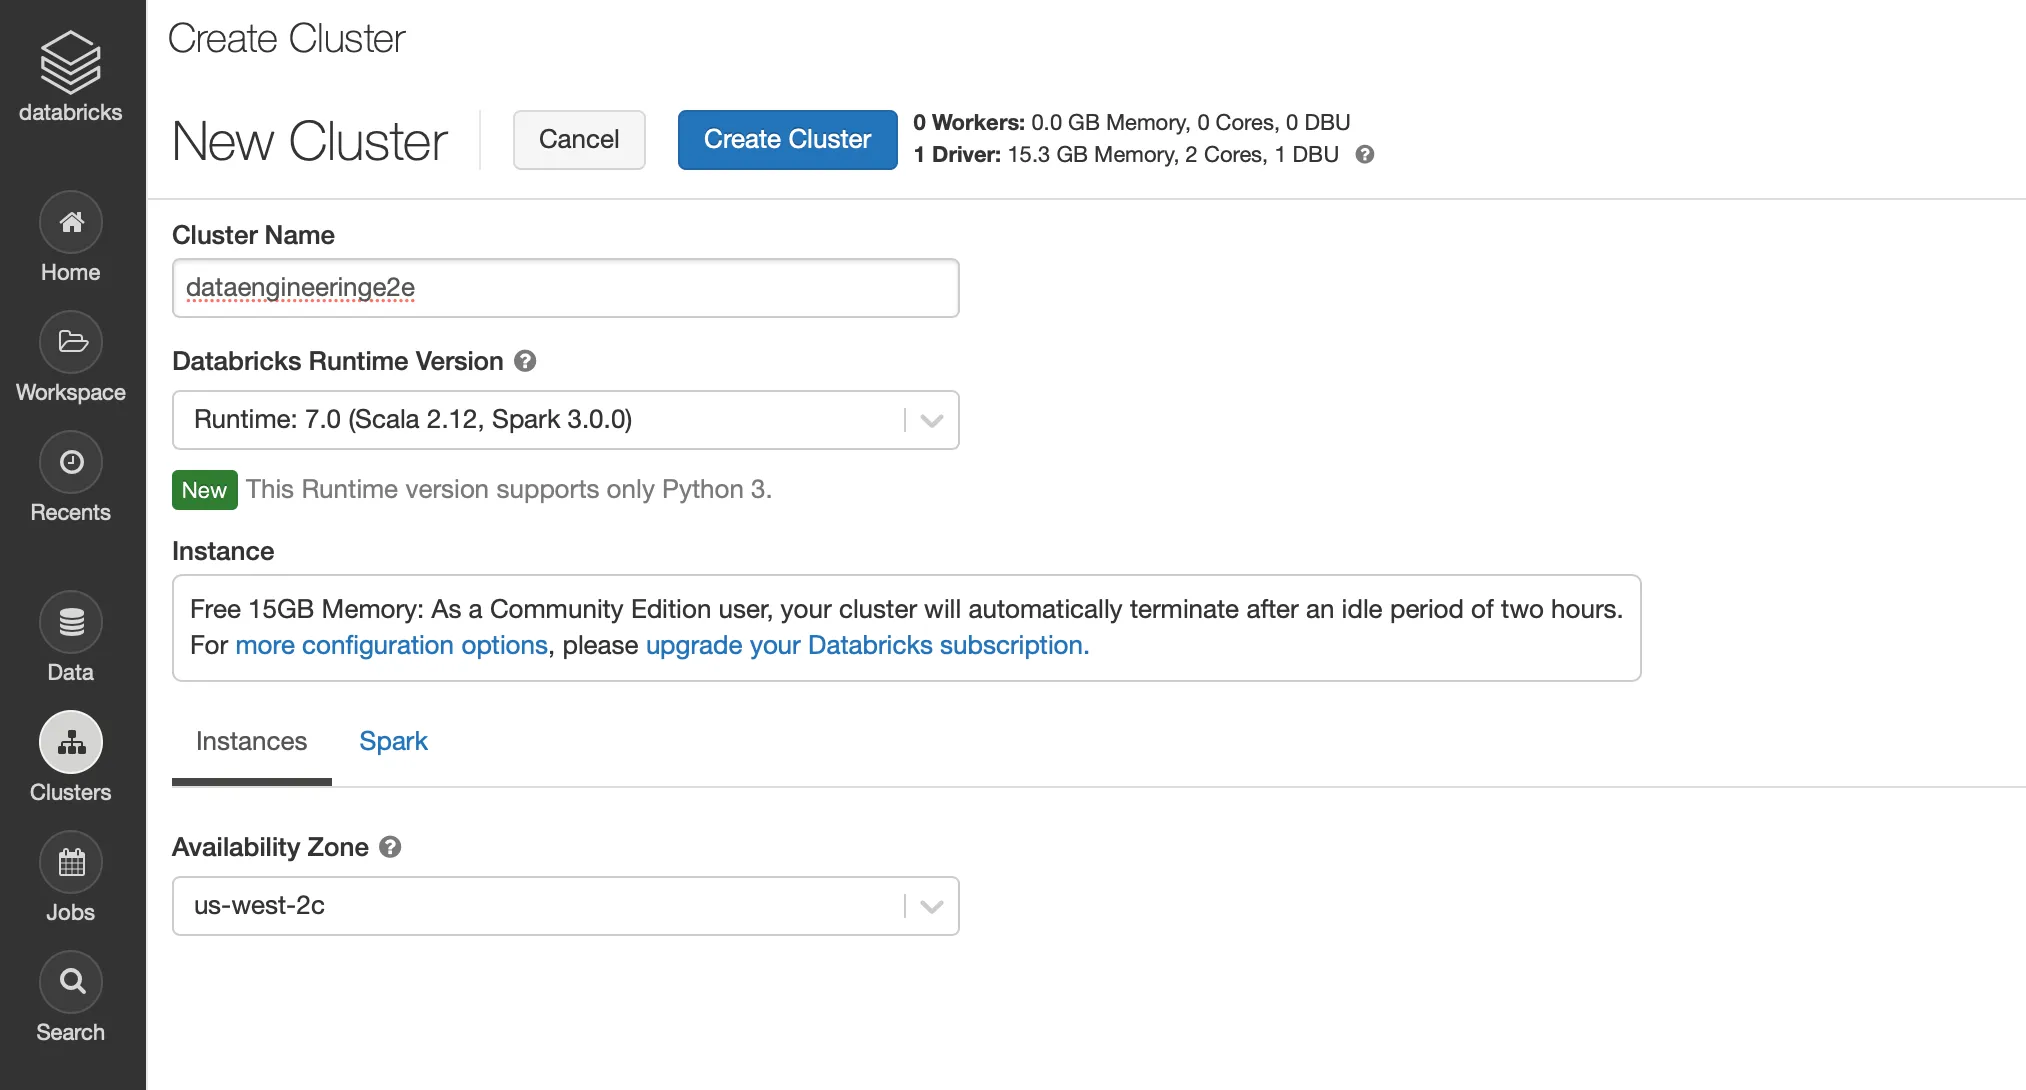
Post login to Databricks, let’s create a Cluster from UI as
Databricks Clusters can also be created programmatically via Databricks CLI, RestAPI etc using following JSON
{
    "num_workers": 0,
    "cluster_name": "dataengineeringe2e",
    "spark_version": "7.0.x-scala2.12",
    "spark_conf": {},
    "aws_attributes": {
        "first_on_demand": 0,
        "availability": "ON_DEMAND",
        "zone_id": "us-west-2c",
        "spot_bid_price_percent": 100,
        "ebs_volume_count": 0
    },
    "node_type_id": "dev-tier-node",
    "ssh_public_keys": [],
    "custom_tags": {},
    "spark_env_vars": {},
    "autotermination_minutes": 120,
    "init_scripts": []
}
We can see in the JSON, Databricks is using AWS underneath to spin up the Community Edition Free Cluster. It will be a single node cluster with Free 15GB Memory for usage.
It’s a Community Edition Databricks Account therefore we don’t have functionality to use Databricks CLI or Rest API as we cannot generate Access Tokens
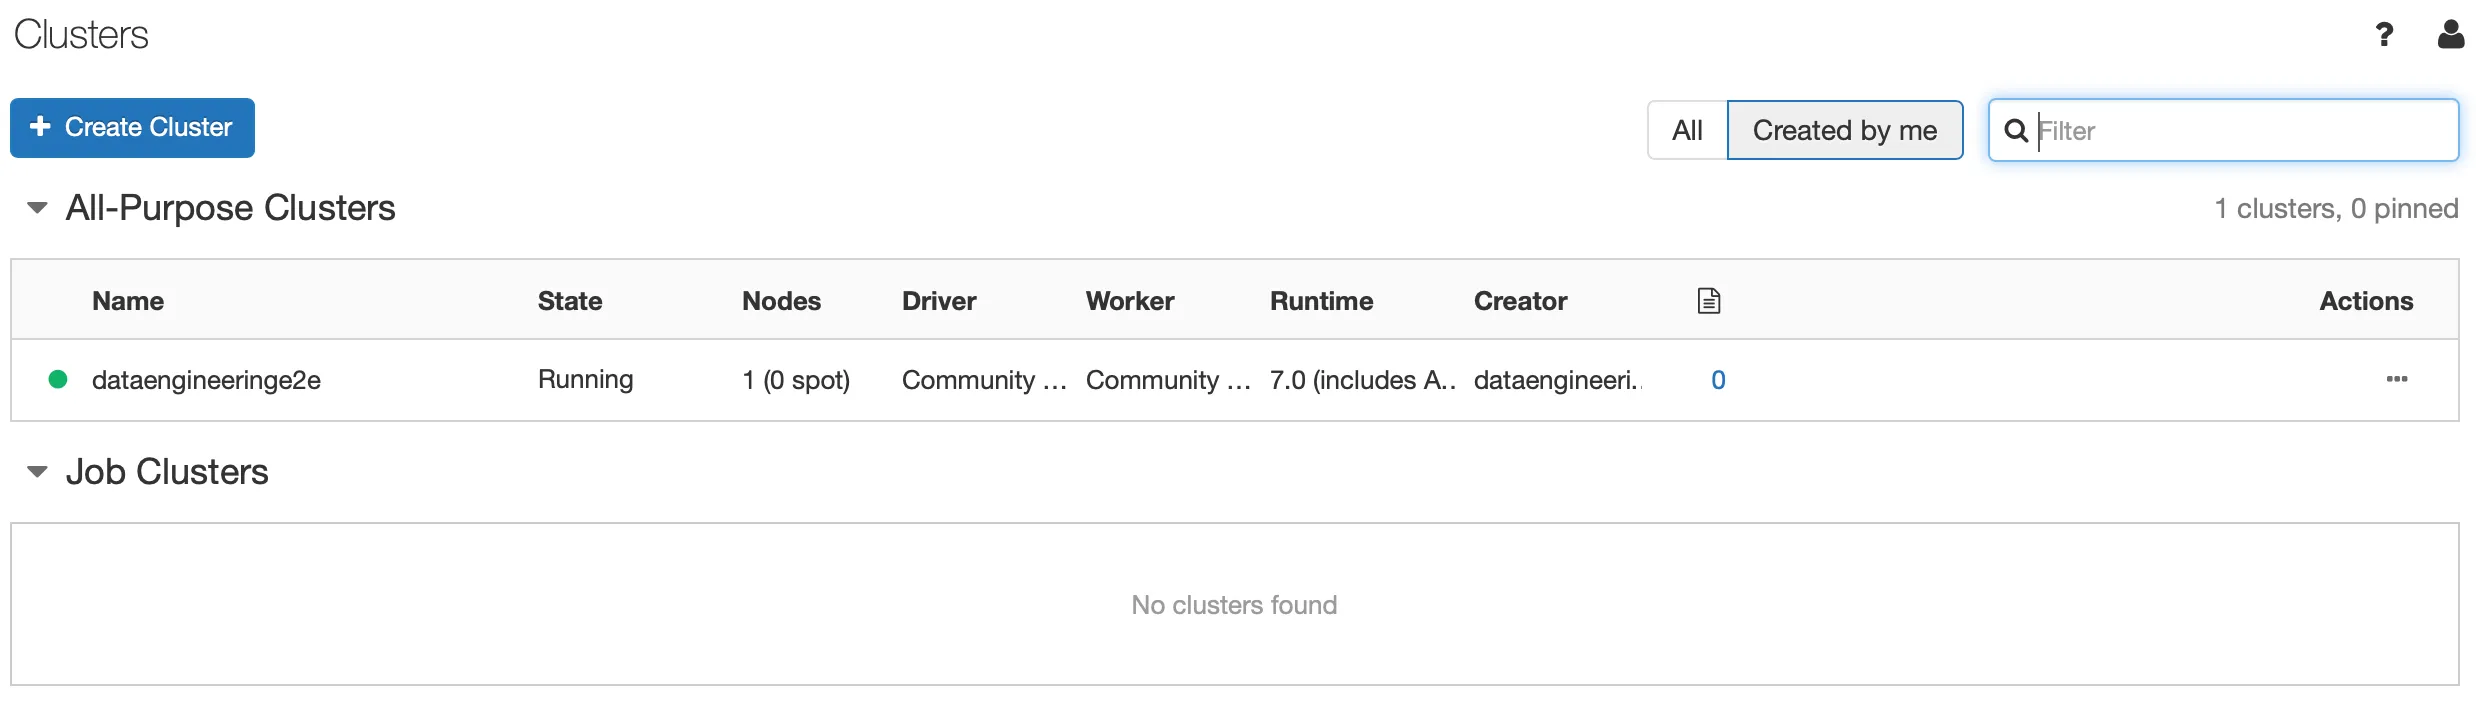
Once Databricks Cluster is up, we can see the running clusters as
Now, finally we can create a notebook, attach it to our cluster and start exploring data
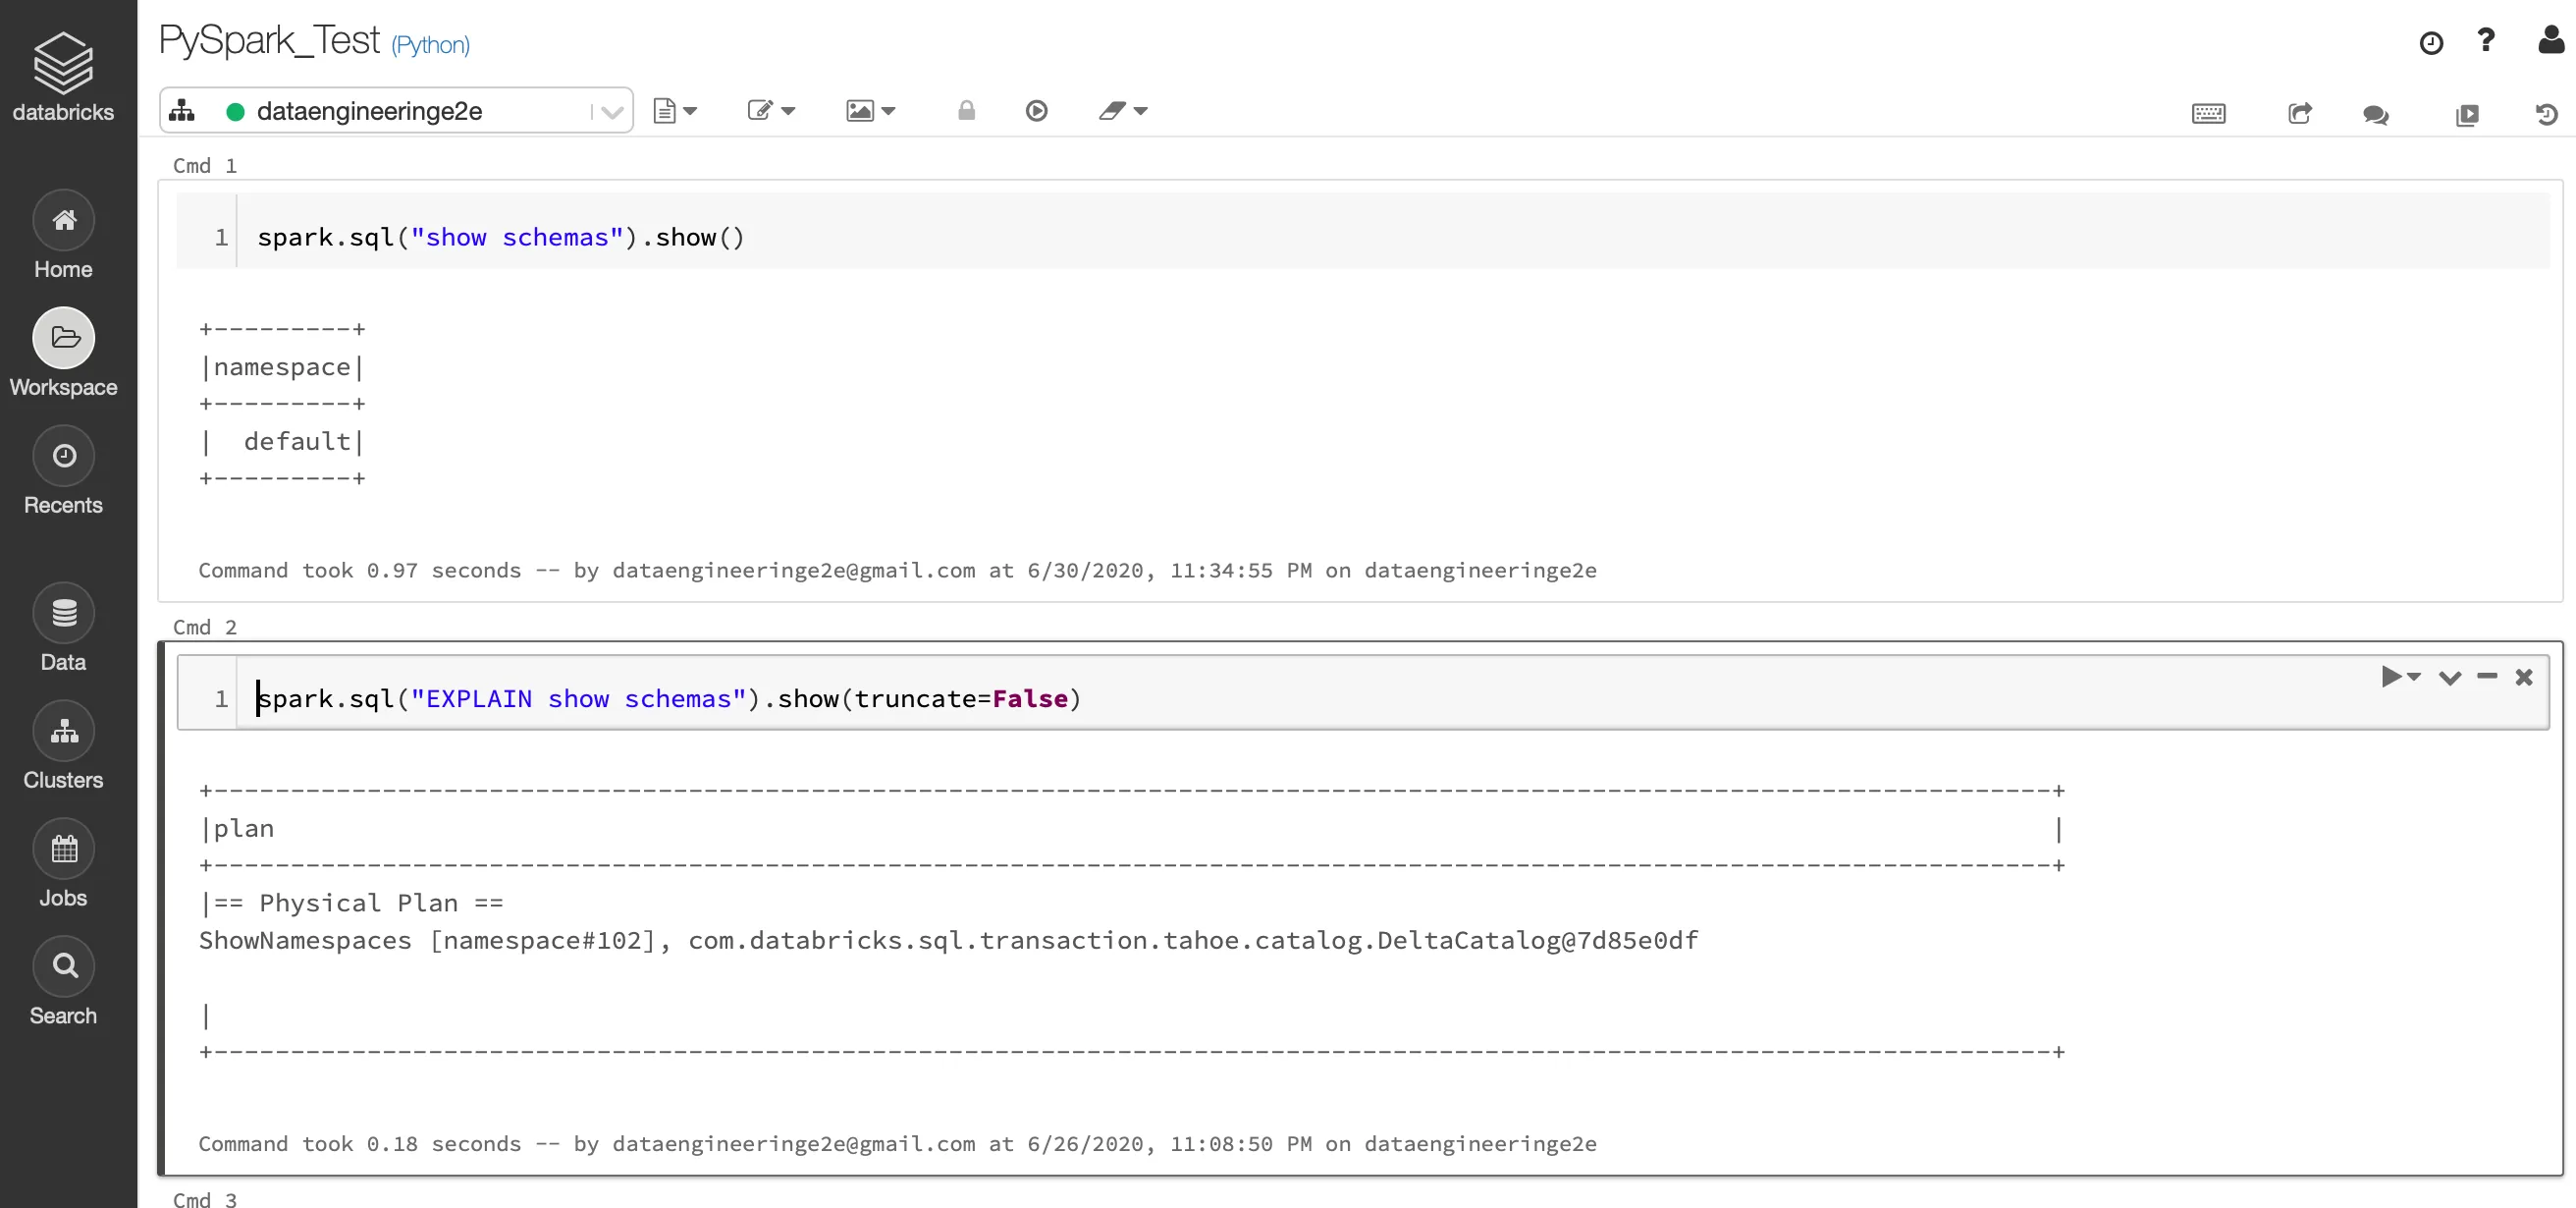
Start exploring the world of Databricks